PowerShell remoting features allow configuring computers to receive remote commands. The administrator can run commands on remote systems.
The Enable-PSRemoting cmdlet configures the computers to receive PowerShell remote commands. PowerShell remoting is enabled by default on Windows server platforms. However, PSRemoting needs to be enabled using Enable-PSRemoting on other versions of Windows.

In this tutorial, we will discuss how to PowerShell Enable-PSRemoting and use remoting features on the Windows Server system.
PowerShell Enable-PSRemoting
Cmdlet: Enable-PSRemoting
Description: Configure computers to receive remote commands.
Syntax:
Enable-PSRemoting
      [-Force]
      [-SkipNetworkProfileCheck]
      [-WhatIf]
      [-Confirm]
      [<CommonParameters>]
Parameters:
-Force: Suppress all user prompts.
-SkipNetworkProfileCheck: It enables psremoting on a Windows client’s system when the computer is on a public network. This parameter enables firewall rules on the Windows client system to receive remote commands from the same local subnet computers. Enable-PSRemoting cmdlet enables firewall rule.
If you want to enable remote access to commands from all public networks, use Set-NetFirewallRule cmdlet available in NetSecurity module.
-Confirm – prompt for confirmation before execution of the command
-whatIf – It describes the command result if the command runs.
Do you know: How to use the cat command in Windows!
Enable-PSRemoting on Local System
PSRemoting feature is by default enabled on Windows Server 2012, Windows Server 2016, or newer versions of Windows OS server system.
PowerShell Tip: Enable-PSRemoting PowerShell feature not enabled by default on Windows clients such as Windows 10 or earlier versions of Windows OS system.
To run the Enable-PSRemoting cmdlet, Start PowerShell using run as administrator.
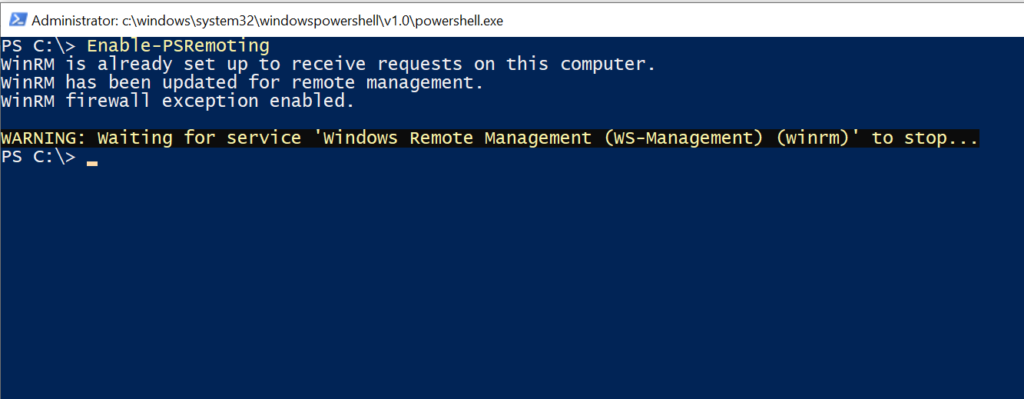
PS C:\> Enable-PSRemoting
When we run the Enable-PSRemoting PowerShell cmdlet, it runs multiple operations in the background.
- Starts the Windows Remote Management (WinRM) service
- Sets WinRM service startup type as Automatic
- Creates a listener to accept any IP address
- Enable firewall exceptions for WS management
- Create PowerShell session endpoint configuration
- Enable all session configurations.
- Set all sessions configuration to allow remote access
- Restart Windows Remote Management (WinRM) service to apply the above changes.
Enable-PSRemoting reboot the system and set up a firewall rule to allow remote commands.
PowerShell Tip: How to get remote printer properties in PowerShell!
Configure computer to receive commands without a confirmation prompt
Using Enable-PSRemoting -Force parameter suppress the confirmation prompt.
PS C:\> Enable-PSRemoting -Force
Above command runs only on the non-public network.
If you want to enable psremoting on a public network, you can use the -SkipNetProfileCheck parameter
PS C:\> Enable-PSRemoting -SkipNetworkProfileCheck -Force
PowerShell Tip: How to get the Computer name and Domain using PowerShell!
Enable-PSRemoting Remotely
PowerShell PSRemoting allows you to run commands on remote computers by enabling PSRemoting on the local system. However, to run a command remotely without PSRemoting, there are different ways to do it using PowerShell.
Let’s understand Enable-PSRemoting on remote computers with examples.
Using PSexec Enable Remote in PowerShell
You can enable PSRemoting on a remote computer using PSexec Utility.
Click here to download the PSexec utility from the Microsoft website and unzip the file PSTool.zip into the directory.
To run PSexec.exe, open PowerShell run as administrator, and navigate to the PSTool folder where it has the PSexec.exe file.
To enable remoting on a remote computer, run the below command
psexec.exe \\Corp-201 -s powershell Enable-PSRemoting -Force
Using the above command will enable PSRemoting on a remote system. However, using PSexec is not a feasible option if you have many computers to enable PSRemoting. It requires downloading the PSexec.exe utility.
Use PowerShell Telnet or Telnet alternatives to ping a remote computer over a specified port.
PowerShell Tip: The best way to download zip files using PowerShell!
Using WMI
Using PowerShell Invoke-CimMethod cmdlet to connect to a remote computer over DCOM.
WMI has a Win32_Process class that allows invoking processes. Using Invoke-CimMethod, it connects to a remote computer, enabling PSRemoting command.
Using Group Policy
The best feasible way to enable WinRM service on across many computers is to use Group Policy. Using Group Policy, you can create a single group policy and apply policy across most of the computers in one go.
To use Group Policy to enable WinRM service, follow the steps
- Enable WinRM Service
- Set WS-Management service to Automatic Startup
- Configure and Open Firewall port for WinRM service
- Create WinRM listener
PowerShell Tip: Use Test-Connection to ping multiple computers in PowerShell!
Conclusion
I hope you find the above article on PowerShell Enable-PSRemoting useful. You can enable psremoting locally and configure the computer to receive commands without prompt using the -Force parameter.
Enabling PSRemoting remotely enables you to run commands on a remote system, without PSRemoting by using the Psexec utility, WMI, and using the Group Policy method to apply policy across thousands of computers at once to receive commands.
You can install software with PowerShell scripts remotely using the Enable-PSRemoting, and Invoke-Command cmdlets.
You can find more topics about PowerShell Active Directory commands and PowerShell basics on the ShellGeek home page.