Microsoft Office 365 is a suite of cloud-based productivity services and tools, including popular applications such as Word, Excel, PowerPoint, Outlook, and Teams.
Managing Office 365, including user accounts, settings, licenses, etc, can be a complex task. IT administrator often prefers PowerShell to connect to Office 365 and automate the tasks.
There are two modules in PowerShell that you can use to connect to Office 365 and administer user accounts, groups, licenses, and settings:
- Microsoft Azure Active Directory Module for Windows PowerShell
- Azure Active Directory PowerShell for Graph
In this article, we will discuss how to connect to Office 365 with PowerShell MSOnline and AzureAd modules.
How to Connect with Microsoft Azure Active Directory Module for PowerShell
To connect with Microsoft Azure Active Directory module with PowerShell, follow these steps:
Step 1: Open a PowerShell terminal ( Run as Administrator)
Step 2: Install the module “MSOnline” using the following command.
Install-Module -name MSOnline
If you are prompted to install the NuGet provider, type Y and press enter. Click Yes or type Y to install the module from an untrusted repository.

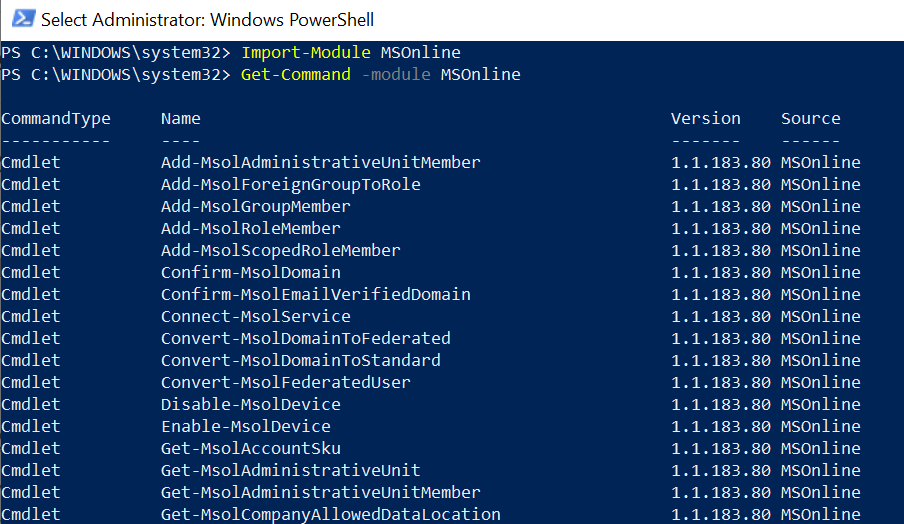
Step 3: Import the Microsoft Azure Active Directory Module for Windows PowerShell.
Import-Module MSOnline
Step 4: Get the list of commands for the MSOnline module using the following command.
Get-Command -module MSOnline

Step 5: Connect to your Microsoft Office 365 Subscription
To connect to Azure Active Directory for your Microsoft 365 subscription, you can use either a username and password or multi-factor authentication (mfa).
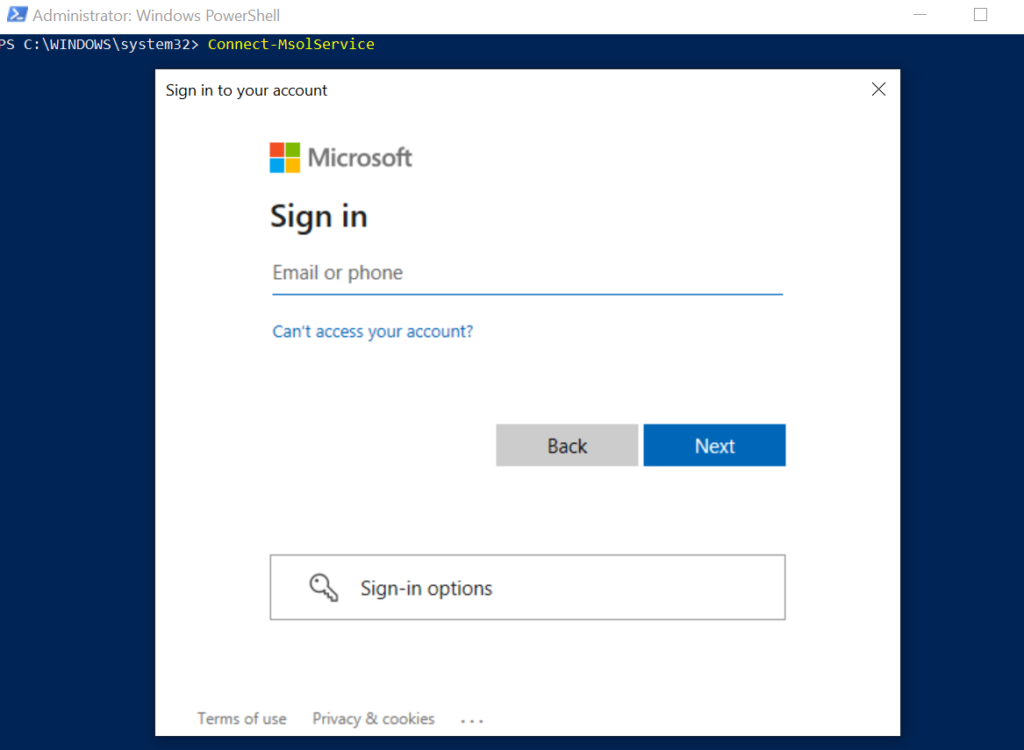
Use the Connect-MsolService cmdlet in the PowerShell MSOnline module to connect to an Office 365 subscription. Enter the Global Admin username and password.
Connect-MSolService
It will prompt Sign in to your account dialog box.

Enter your Microsoft 365 work and school account username and password, and click next.
If your account is configured with multi-factor authentication (MFA), you will get a prompt to approve a sign-in request.
After the successful sign-in, the “Sign-in to your account” dialog box will close and return you to the PowerShell terminal.
Step 6: To verify if you are connected to Office 365, run the following command.
Get-MSolUser
This command will return a list of all users in your Office 365 tenant.
PS C:\WINDOWS\system32> Get-MsolUser
UserPrincipalName                  DisplayName       isLicensed
-----------------                  -----------       ----------
gary@shellgeeklab.onmicrosoft.com  gary edler        False
admin@shellgeeklab.onmicrosoft.com shell geek True
samer@shellgeeklab.onmicrosoft.com samer amberson    True
john@shellgeeklab.onmicrosoft.com  john alwin        True
How to Connect With Azure AD PowerShell for Graph Module
To connect with Azure Active Directory PowerShell for the Graph module, you will need to install the AzureAD module. The commands in the Graph module have AzureAD in their cmdlet name.
Follow the steps below to install the module and connect to your Microsoft 365 subscription.
Step 1: Open the Windows PowerShell terminal ( Run as Administrator)
Step 2: Install the AzureAD module using the following command.
Install-Module -name AzureAD
If you are prompted to install the NuGet provider, type Y and press enter. Click Yes or type Y to install the module from an untrusted repository.

Step 3: Import the module using the following command.
Import-Module AzureAD
Step 4: Get the list of commands for the AzureAD module using the following command.
Get-Command -module AzureAD
Step 5: Connect to your Microsoft Office 365 Subscription
To connect to your Azure Active Directory for your Microsoft Office 365 subscription, you can use account name and password or multi-factor authentication (MFA).
Use the Connect-AzureAD cmdlet in PowerShell to connect to Office 365.
Connect-AzureAD
It will prompt the “Sign in to your account” dialog box, enter your Microsoft 365 work and school account username and password, and click next.
After the successful sign-in, the dialog box will close and return you to the PowerShell terminal.

Step 6: To verify if you are connected to Office 365, run the following command.
Get-AzureADUser
This command returns users from the Azure Active Directory.
PS C:\WINDOWS\system32> Get-AzureADUser
ObjectId                             DisplayName       UserPrincipalName                  UserType
--------                             -----------       -----------------                  --------
65bbf88c-ec92-417c-b7f1-fab8ecae7561 shell geek admin@shellgeeklab.onmicrosoft.com Member
1f149c47-a670-4f12-a4ac-01423cbafb58 gary edler        gary@shellgeeklab.onmicrosoft.com  Member
ec2e9ac0-680b-4666-a8a9-e10a24910c80 john alwin        john@shellgeeklab.onmicrosoft.com  Member
cf634aac-d7d1-41a4-aad9-544c0bfda070 samer amberson    samer@shellgeeklab.onmicrosoft.com Member
Conclusion
I hope the above article on how to connect to Office 365 with PowerShell using the MSOnline and AzureAD modules is helpful to you.
You can find more topics about PowerShell Active Directory commands and PowerShell basics on the ShellGeek home page.