To rename a local user account in PowerShell, use the `Rename-LocalUser` command. This command renames a local user account.
Here, is the PowerShell code to rename a local user account.
Rename-LocalUser [-Name] <String[]> [-NewName] <String> [-SID] <SecurityIdentifier[]> [-InputObject] <LocalUser[]>
In this article, we will discuss how to rename a local user account using the PowerShell Rename-LocalUser command.
Rename a Local User Account Using PowerShell
To rename a local user account in PowerShell, use the Rename-LocalUser cmdlet with the Name parameter to specify the local user account name,
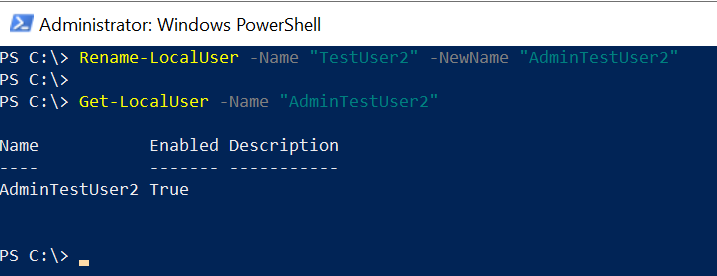
Rename-LocalUser -Name "TestUser2" -NewName "AdminTestUser2"
In the above PowerShell script, the Rename-LocalUser cmdlet renames the local user account name specified by the Name parameter “TestUser2” to “AdminTestUser2“.
To check if the user account is renamed or not, use the Get-LocalUser command given below.
Get-LocalUser -Name "AdminTestUser2"
The output of the above PowerShell script gets the local user account details including his name, enable status, and description.

Conclusion
I hope the above article on how to use the Rename-LocalUser command in PowerShell to rename a local user account is helpful to you.
You can find more topics about PowerShell Active Directory commands and PowerShell basics on the ShellGeek home page.