Run PowerShell as System is important for several reasons such as higher permissions to perform the actions that user accounts can not, and access to files, and folder.
Running PowerShell as NT Authority/System account provides consistency as it ensures the script runs the same way regardless of the logged-on user.
Using the Psexcec.exe light-weight utility, it launches PowerShell as the System account. Another way to run PowerShell as System is to use Task Scheduler.
In this article, we will discuss how to run PowerShell as System Account using Psexec.exe and use Task schedule to launch PowerShell as the System account and run the script under the system account.
Use Psexec to Run PowerShell as System
PowerShell script running as a system account has the highest level of security permission and ensures the script should run the same way.
Psexec utility is used to launch the PowerShell as System, click on the link below to download the psexec v2.40 version and extract the zip file.
https://learn.microsoft.com/en-us/sysinternals/downloads/psexec
To use the Psexec utility, open the command prompt as an admin and specify the psexec.exe path to run the following command.
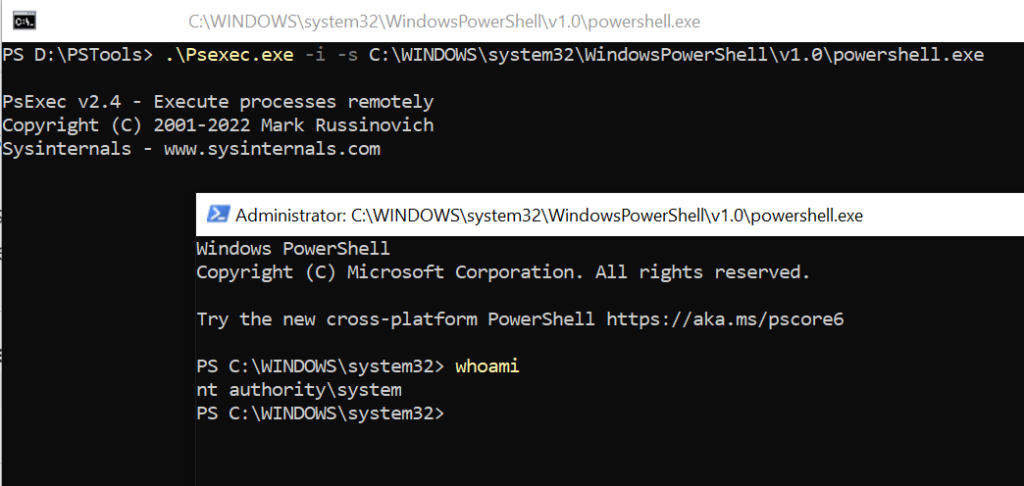
Psexec.exe -i -s C:\WINDOWS\system32\WindowsPowerShell\v1.0\powershell.exe
In the above command, the psexec.exe command uses parameter -i to run the PowerShell so that it interacts with the desktop and -s specify to run the PowerShell in the System account.
The output of the above command opens the PowerShell terminal that runs in the system account, use the whoami command to display that it runs in the nt authority\system account.
Use Task Scheduler to Run PowerShell as System
Using the task schedule, it can launch the PowerShell as a System account and runs the program or script.
let’s create a PowerShell script that gets the current user using whoami.exe or using the GetCurrent() method of [Security.Principal.WindowsIdentity] class and store the script as get-user.ps1
$userinfo = [PSCustomObject]@{
    'whoami'          = whoami.exe
    'CurrentUser'     = [Security.Principal.WindowsIdentity]::GetCurrent().Name
}

$userinfo | Out-File -FilePath D:\userinfo.txt
In the above PowerShell script, using the PSCustomObject, it creates structured data that contains whoami and CurrentUser information and stores them in the $userinfo variable.
$userinfo variable is passed to the Out-File cmdlet to write the output to the text file at the specified location.
Now, to run PowerShell as a System account using the Task schedule, follow the below steps:
- Open Task Scheduler ( Run >> taskschd.msc)
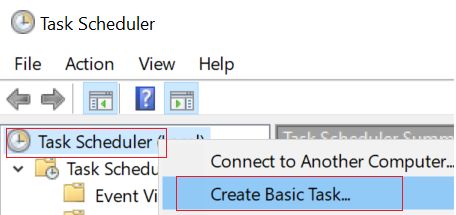
- Right-click on Task Scheduler and Click on “Create Basic Task“
- Provide a name for the task and click “Next“

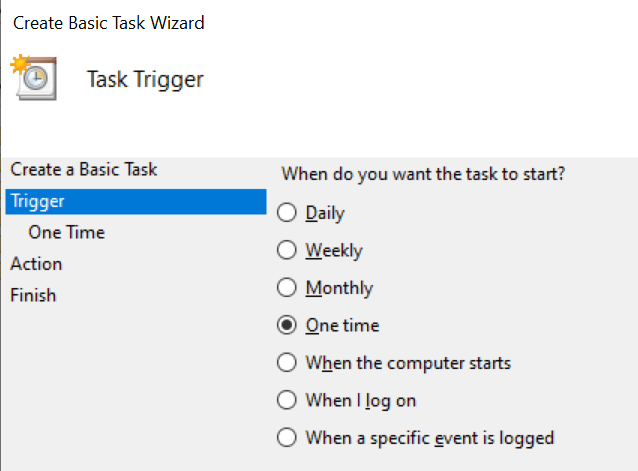
- Set a trigger (“One Time“) to run the script and click “Next“
- Select the start time and click “Next“

- Select “Start a Program” and click “Next“
- Select a program as “powershell.exe” to run the script and add arguments as script path to schedule a PowerShell script with aruments.
–NoProfile –ExecutionPolicy Bypass –File D:\PS\get-user.ps1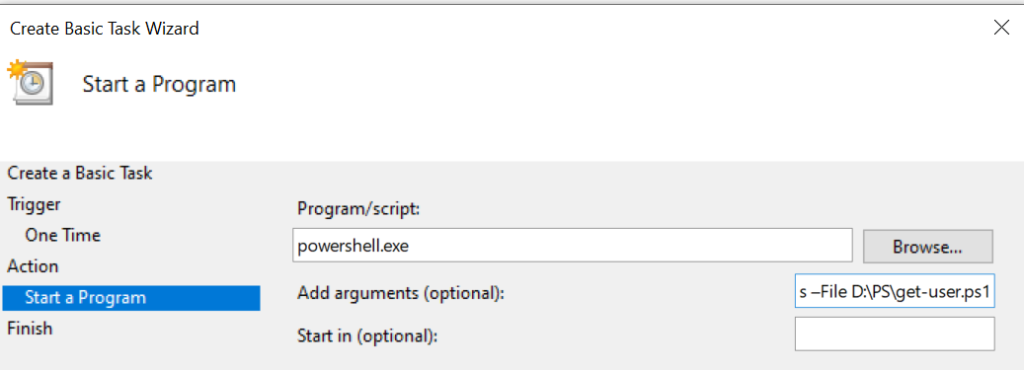
- Click on the ‘Open the Properties dialog for this task when I click Finish‘
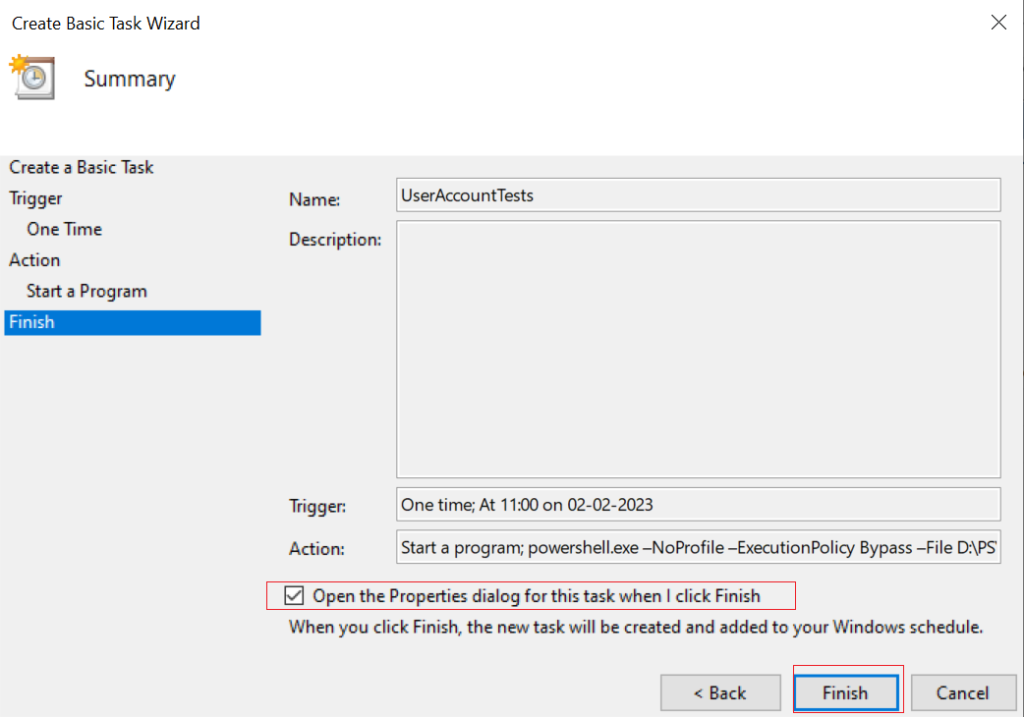
- Change the user to System ( click on Change User or Group and Search ‘System’ account) and select configure for Windows 10
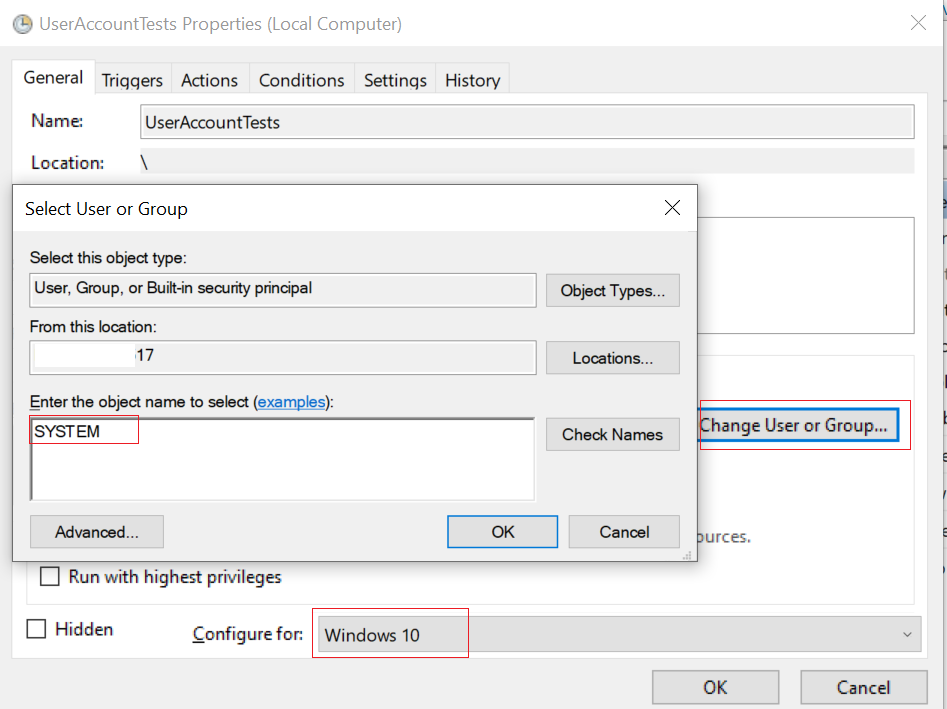
- Click on OK, it will close all the dialog and create a basic task scheduler.
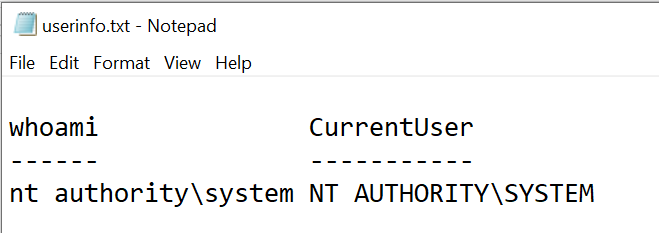
The task scheduler will run the PowerShell script as a System account at the scheduled time. Script writes the user information to a text file. Open the text file and check its content.
Conclusion
I hope the above article on how to run PowerShell as a System account using psexec and Task Scheduler is helpful to you.
The scheduled task runs the PowerShell script with arguments as provided.
You can find more topics about PowerShell Active Directory commands and PowerShell basics on the ShellGeek home page.